Source: google.com via Elizabeth on Pinterest
Source: google.com via Elizabeth on Pinterest
Source: google.com via Elizabeth on Pinterest
So I went looking for a peg board at Lowe's, to find that they only come in dirty-white and wet-cardboard-brown. To get this cute crafty look, I decided to paint mine. TaDa!
As you can see, I need to get some ribbon and other fun things to hang up. Until then: here is how you can make a pretty peg board too.
Craft Storage Peg Board Tutorial
Materials:- Peg board - mine was 4'x8', but you can use a larger size, or have someone cut it for you at the store.
- 2"x4" plywood to frame the back of your peg board. I bought 3 in 8 ft long pieces, and had a Lowe's employee cut one of them down to fit the two short sides of the frame. NOTE: Line up your frame while the guy who is cutting the wood is still standing there! You don't want to get it home to realize it doesn't fit!
- Drill with 1/8" bits (one to make the hole and one to put the screw in)
- Eight 1/8" wood screws
- Peg Board Hook Kit
- Spray paint
- Painters tape
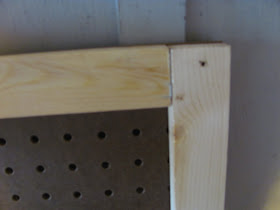
1. Line your long plywood piece up flush against the edge of the peg board. You want to mark the place for your screw so that it secures the plywood about 3/4" from the end of the plywood.
2. Once you've marked the peg board, put the plywood down and drill a hole in the peg board only. Do so on all four corners, approximating where the whole should be.
3. Repeat this process with the short pieces of plywood.
4. After all the holes are drilled, line the plywood up again. Place the screw inside the hole you've drilled in the peg board. Using the other drill bit, drill the screw through the hole and into the plywood.
You now have a back-framed piece of peg board! The problem is that it's an ugly color.
PAINTING:
1. Lay out some newspapers in a well ventilated or outdoor area. Place the peg board on top.
2. Shake up the paint and SPRAY! Until the whole board is covered.
3. Let it dry for an hour - then move it to a safe place and allow it to set over night.
STRIPES:
1. Arrange painter's tape on the pegboard in whatever pattern you desire. I chose stripes. Remember that the part you cover will remain the original color.
2. Repeat the spray painting procedure from before!
To finish it off, attach your peg board hooks and hang it up!


This is so great. I did the same thing in my sewing area and it's really helped me keep more organized. Love that you painted the board with stripes!
ReplyDelete